An attempt at a tutorial utilising AWS for Scalable Image-Based Transcriptomic Data Analysis
Assignment done by: Jeffrey and Yida
Foreword: The use case of this tutorial may be highly specific and extensions to other projects is hopeful but have yet to be attempted.
This tutorial is meant to be built upon the walkthrough by Shannon Axelrod in her article Building a scalable image processing pipeline for image-based transcriptomics. Her article has very clear explanation of image-based transcriptomics and starfish, do check out the article before this tutorial to get an idea of the workflow.
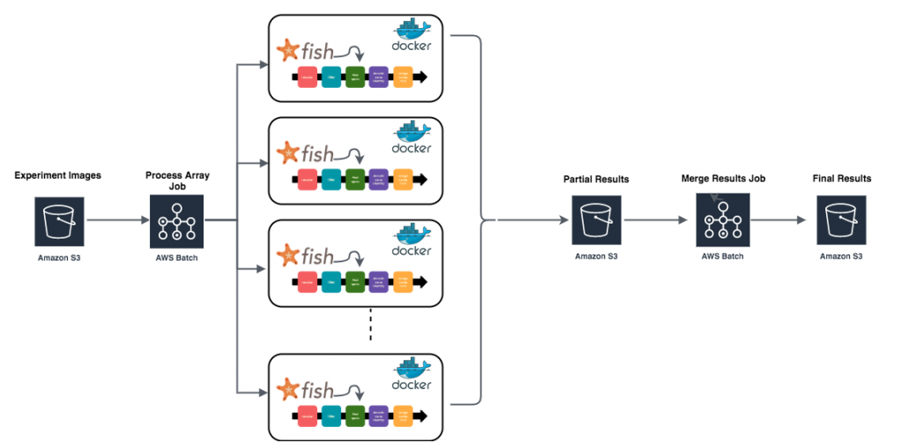
Summary of workflow retrieved from the article
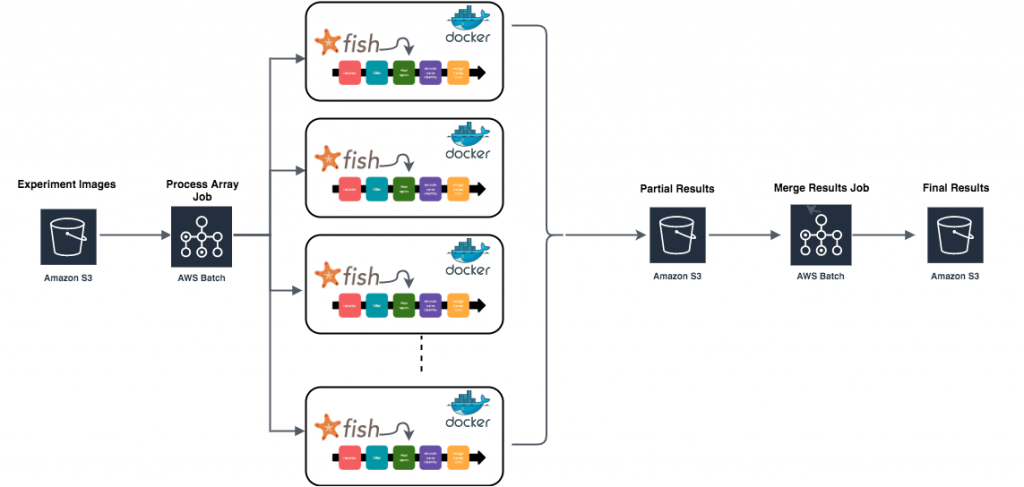
Motivation for this tutorial
Despite the article being published less than a year ago, the walkthrough cannot be replicated on my end (could be due to a lack of knowledge/understanding of both AWS and starfish). As such, I went through quite a bit of digging and exploration before completing the entire workflow on a similar set of data.
This tutorial is meant to be largely reproducible on Command Line Interface, with certain components to be done on the AWS console.
Introduction to AWS Batch and running a Batch Job using a Docker container
I strongly recommend following through this article titled AWS Batch: A Detailed Guide to Kicking Off Your First Job by Christian Melendez. It will guide you to set up and configure your AWS account and even AWS CLI. Once you get it up and running, the subsequent tutorial will be a breeze.
Creating your working directory, download all the json files and place them in your working directory.
To facilitate the subsequent steps and to make sure that your S3 bucket has been set up, run the following command to upload your current working directory with all the json files to your S3 bucket.
mkdir tutorial
cd tutorial
aws s3 sync . REPLACE_WITH_YOUR_S3_BUCKET
In my case, aws s3 sync . s3://zb4171-2020/Group2/
Retrieving the raw data and conversion to SpaceTx format
This tutorial will be utilising data from In-Situ Sequencing (ISS) and the details can be found here. For simplicity, I have replicated the downloading and processing steps below: Don’t worry if you aren’t an expert yet, the fully constructed python file can be found on their SpaceTX’s GitHub. Download the format_iss_breast_data.py into your working directory.
mkdir -p iss/raw
aws s3 cp s3://spacetx.starfish.data.public/browse/raw/20180820/iss_breast/ iss/raw/ \
--recursive \
--exclude "*" \
--include "slideA_1_*" \
--include "slideA_2_*" \
--include "fabricated_test_coordinates.json" \
--no-sign-request
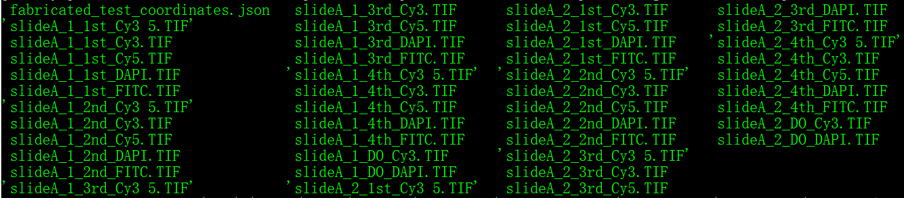
ls iss/raw
This command should download 44 images:
- 2 fields of view
- 2 overview images: “dots” used to register, and DAPI, to localize nuclei
- 4 rounds, each containing:
- 4 channels (Cy 3 5, Cy 3, Cy 5, and FITC)
- DAPI nuclear stain
What you should see on the command line:
Now we want to format the raw data into SpaceTX format.
mkdir iss/formatted
python3 format_iss_breast_data.py \
    iss/raw/ \
    iss/formatted \
    2
ls iss/formatted/*.json
What you should see on the command line:

Copy the formatted .json files into your S3 bucket
aws s3 sync iss/formatted/ REPLACE_WITH_YOUR_S3_BUCKET
In my case, aws s3 sync iss/formatted/ s3://zb4171-2020/Group2/formatted
What you should see on the command line:

What you should see on the AWS S3 Bucket:

Configuring IAM roles, creating compute engine and creating job queue
Either one of these guides will effectively bring you through this segment:
- AWS Batch: A Detailed Guide to Kicking Off Your First Job by Christian Melendez.
- Building a scalable image processing pipeline for image-based transcriptomics by Shannon Axelrod.
Note:
- No instance will be created at this point (if you set minimum vCPUs to 0), instances will only be created when needed automatically.
- Set priority to a lower number if you want it to run first when you have multiple jobs.
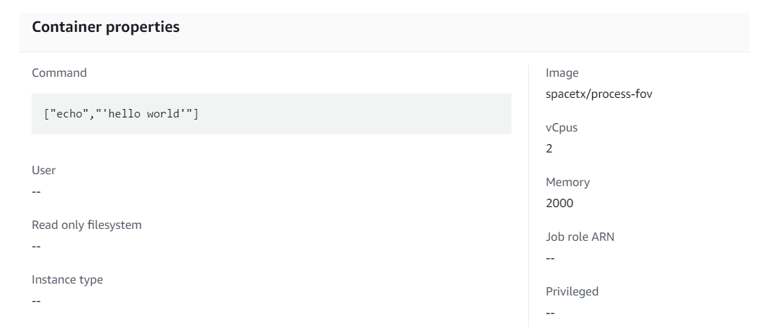
Create Job Definition
Note: Under container properties, modify the image to your respective docker, in this case spacetx/process-fov
- Using web browser At this point, command field can be overwritten so we can leave it as it is for now.
What you should see on the AWS Batch Job Definitions:
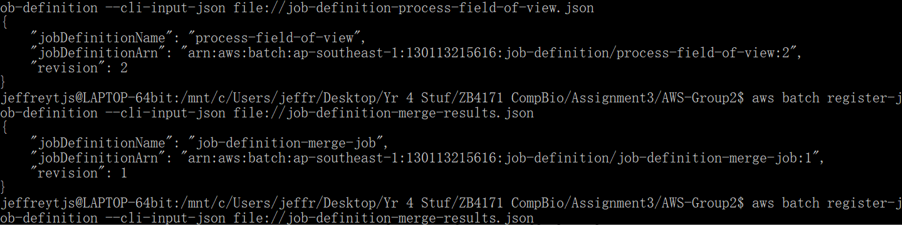
- Using CLI
aws batch register-job-definition --cli-input-json file://job-definition-process-field-of-view.json`aws batch register-job-definition --cli-input-json file://job-definition-merge-results.json`
What you should see on the command line:
What you should see on the AWS Batch Job Definitions list:


For more information:
Creating Jobs
python3 starfish-workflow.py \
--experiment-url "s3://zb4171-2020/Group2/formatted/experiment.json" \
--num-fovs 4 \
--recipe-location "s3://zb4171-2020/Group2/recipe.py" \
--results-bucket "s3://zb4171-2020/Group2/formatted/results/" \
--job-queue "zb-jeff-queue"
What you should see on the command line:

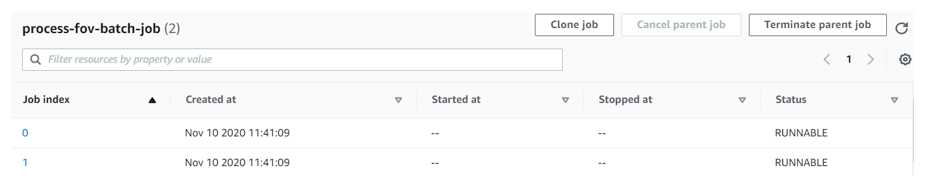
What you should see on the AWS Jobs List:

Clicking into process-fov-batch-job:
Upon completion of the jobs:

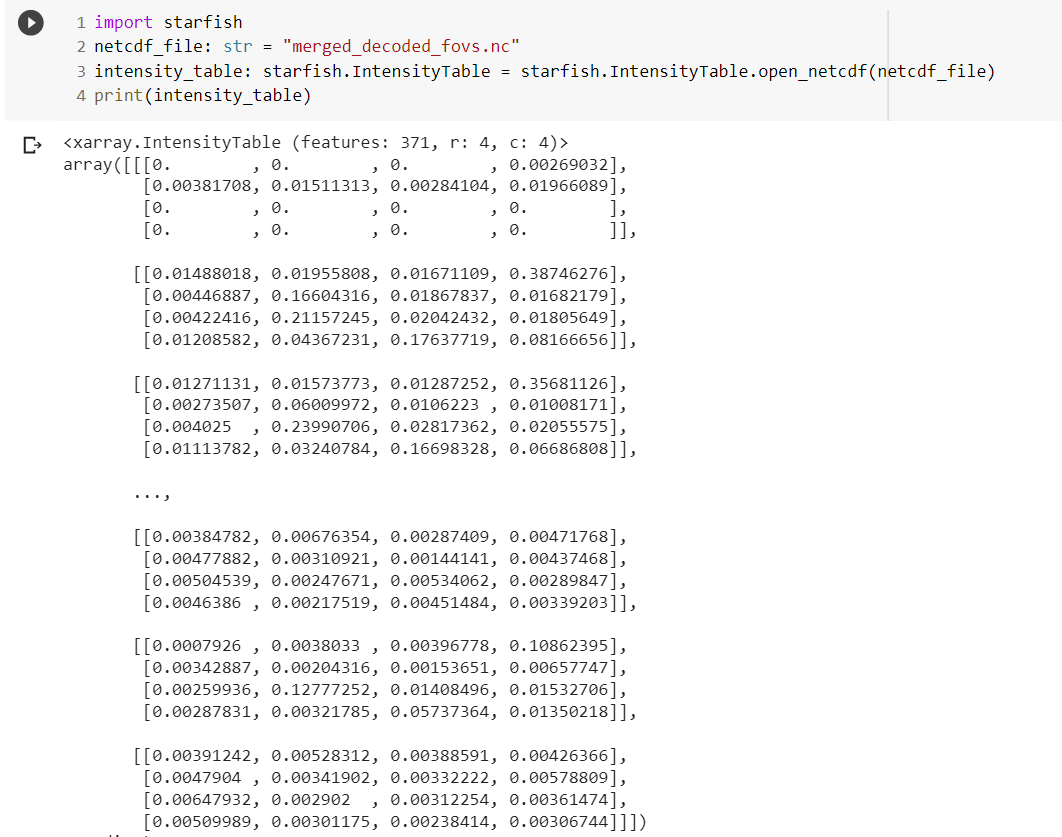
Retrieving the results from S3 Bucket

Results can then be used for further analysis, this example displays the results on Google Colab.
Bonus:
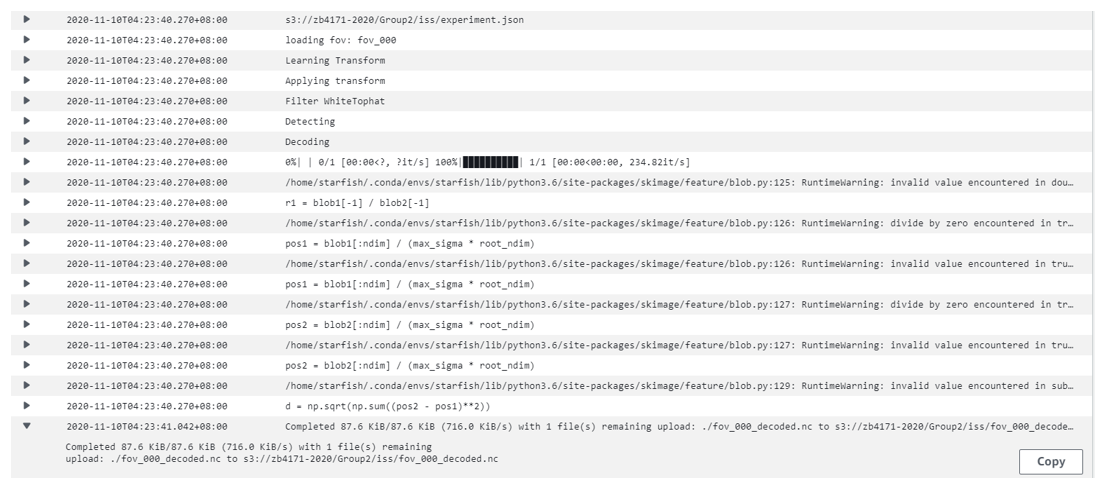
For debugging purposes, the logs for each job can be viewed at the highlighted link below:
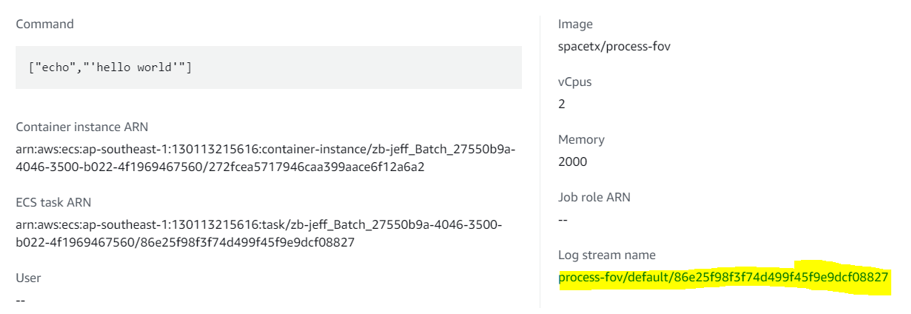
What you will see:
Example:
Credits:
Initial inspiration for project - Article by Shannon Axelrod
Basic understanding of AWS Batch - Article by Christian Melendez
Script for downloading and formatting data - SpaceTX Documentation
Source of example codes - SpaceTX StarFish GitHub
Future work - Segmentation and mapping